
So we are almost 2 weeks on from when we began the alterations to the kitchen. We started off by writing quite an extensive to do list of things we'd like to get done by the end of the first weekend but events have got ahead of us and we aren't quite where we would like to be. However, all our kitchen wall cabinets have now been installed. So after almost two weeks without storage we finally somewhere to put our cups and glasses which until now have been stored in an empty laundry basket. This one, no less!

The kitchen still looks pretty much like the above, but with a few less boxes. Most of the boxes are for the bottom units and 1 very high full cupboard which will house the oven. Annoyingly, because we have rearranged where the bottom cupboards will sit, we can't take each bottom cabinet out one by one. They all have to come out together. It's this that makes it rather tricky, but we plan to get the majority of the work done THIS weekend! Wish us a bucket full of luck, we will need it. Not to mention the fact we have never been able to find where to turn the water off in our house so we'll have to freeze our sink pipe, remove the current unit and reconnect and install the new one, as the clock ticks and the ice melts.

Issues like the above wonky socket, do need resolving and I have purchased some shiny new sockets to replace the ones that we had when we moved in which are completely covered by grout! I am pleased to say that the walls don't look anything like this now as Neil has painstakenly plastered almost two entire kitchen walls. Plastering is a very difficult art, and we have had to invest a fair amount in purpose built tools, but it was a choice of either hiring a plasterer £££ or buying a large number of tiles to cover the dodgy walls ££. I've done a breakdown of the tools we have needed for plastering further down the page and it has been worth the cost as we get to keep the tools forever. Where as workman's time and tiles don't stay with us forever.
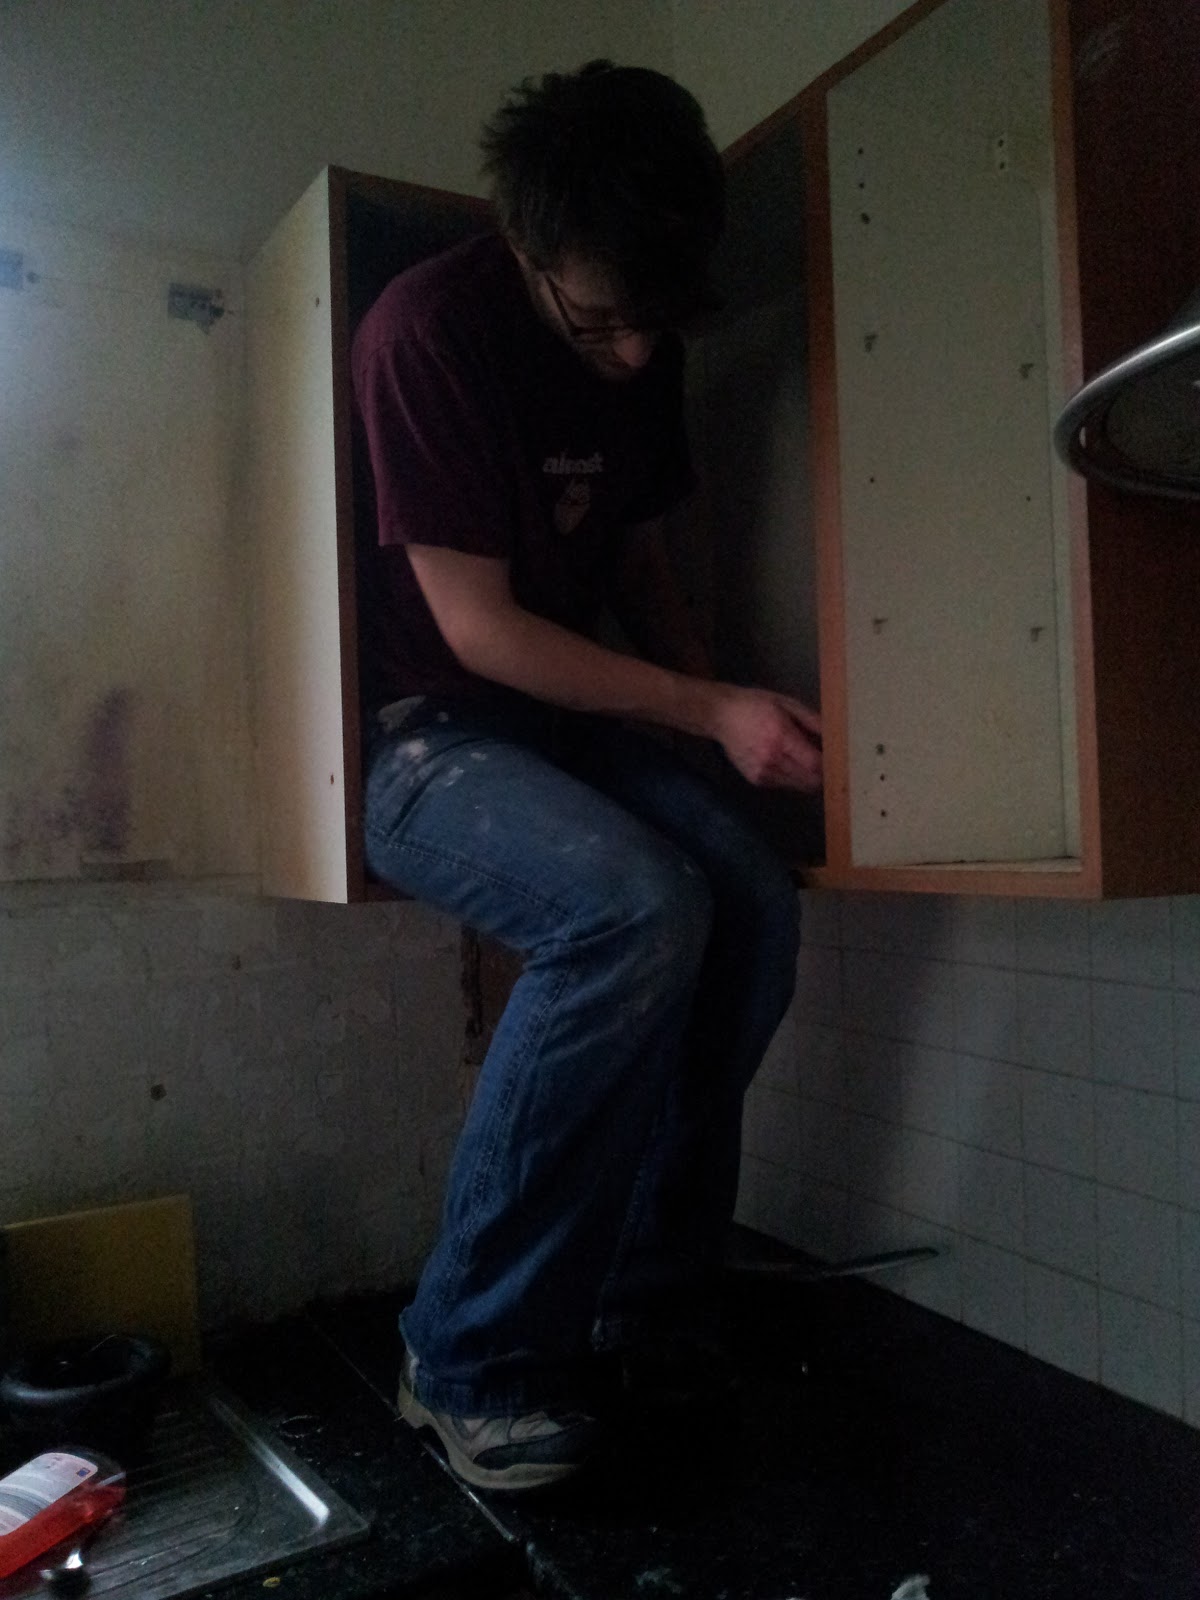
Here we have Neil taking off the kitchen cupboards, they were surprisingly well attached to the wall with two brackets at the back of each cupboard. Unfortunately, the brackets and screws had rusted together so we had to crow bar them out of the wall. Naturally this left massive holes in the wall so we've used filler to make these good, before plastering over. All of this needs time to dry and has been slowing us down with the limited evenings and weekends we have to do things in. Luckily we were loaned a dehumidifier from my parents in law when we moved into the house which we have failed to return. This has helped us so much over the years.
To do the plastering we have needed:

This is the first wall Neil plastered, it was previously covered in tiles, but we don't think these are needed, and didn't want to spend the money on replace them! Instead we have had to spend time and money plastering them but I have to say, it has been well worth it. All we have to do now is give them a sand over and it will look fantastic.

As we only have one trowel, whilst Neil was finishing off the second round of plastering, I started putting together the top cabinets as we were able to get these off the wall and measure where they needed to be. (Fingers crossed our measurements are up to scratch in an end terrace that has non straight walls. The only place I had to build them was the dining room hallway and it was getting a little difficult to move anywhere once they were constructed! You'll also see the bags full of cooking ingredients on the right as we spent the first week with no kitchen cupboards on the wall. The good thing has been having to clear things out though, did I really ever need 3 jars of pickled onions!?
 |
| Corner cupboard in process |

While I was building cabinets, Neil carried on with the plastering, trying to make good the area where the second wall cupboard will hang (in the corner). This also included plastering the window sill which was previosuly covered with tiles until we set to work chiselling them away.
Where there were previously bare walls, like behind the cabinets the previous owner covered the very uneven walls with lining paper which we have removed and plastered. Once the plaster was on, dry and sanded I used an old white emulsion as a base coat. Then used our new paint, Contemporary White from Homebase. Once everything is painted I can't even imagine how good it will look. It's already starting to come together as you can see below with the arrival and installation of the first wall cupboard and the built in microwave.

So now it's on to stage two this weekend, so I guess Friday night will be a busy one as we prepare for the base units. This will include removing all the tiles from the floor and laying down the 4 ply wood sheets that have been cluttering up our hallway for the past week! I'm excited but a little daunted at the same time. Maybe I need to go back to my inspiration board to keep me sane...

Loving your blog and extremely impressed that you are managing to do all this with a small person in your life! Our evenings are spent collapsed in a general heap at present. We are hoping to move to a doer upper soon and this gives me hope that we may actually manage the doing it up part! x
ReplyDeleteThank you so much for your lovely comment. It hasn't all gone quite to plan this weekend but we are getting there (slowllllly). When we are not up ladders we are normally being swallowed up bu the sofas watching trashy TV! Good luck with your doer upper, will you be blogging about it?
ReplyDeleteMy blog has been sorely neglected since the little man came into our lives but I hope so!
ReplyDelete