Shabby Blog

Tuesday 30 August 2011

Baby Bargain!

Hooray, I can now tick off one of our 'to buy' items from the baby list and something we knew we'd have to buy rather than pick up off friends!


And naturally it was an ebay bargain @ £16.  And completely by chance it is being posted from the Village in Norfolk I used to live in! I paid for it today and cannot wait for it to arrive. YAY

Quiche numero uno

Today I decided to give quiche a go. I was inspired predominantly by Episode 2 of The Great British Bake Off where I drooled over a number of unusual quiche concoctions.

So, in a fit of enthusiasm I headed to the kitchen to prepare quiche for our lunch. Here's the concoction I came across in the fridge which made it's way in to the mix.


So first for the crust: (Taken from here)

Ingredients
  • 125g/4oz plain flour 
  • pinch of salt 
  • 55g salted butter, cubed 
  • 2-3 tbsp cold water 
  1. Put the flour and salt in a large bowl and add the cubed butter. 
  2. Rub the butter into the flour until you have a mixture that resembles breadcrumbs with no large lumps of butter remaining. 
  3. Using a knife, stir in the cold water until the mixtures comes together as dough. 
  4. Wrap the dough in cling film and chill for 10-15 minutes before using. (I didn't bother but you know if you have the time!) 
  5. Once ready roll out thinly into your chosen quiche dish and blind bake for 10minutes in a preheated oven at 200 degrees Celsius.
And now for the filling:
  • 4-5 mushrooms, sliced
  • 1 large or 2 small red onions thinly sliced
  • 1 garlic clove finely diced
  • 1 tbs of olive oil
  • 3 broccoli florets sliced
  • 3 pork sausages skinned
  • 2 large eggs
  • 100ml of milk
  • A large handful of cheddar cheese grated
  • salt and pepper to season
  • 1 tbs of plain flour
1. Sauté the onion, garlic and mushroom in the olive oil until soft and remove from the pan

2. Add the skinned sausages to the empty pan and break up into small pieces as it cooks until browned

3. Whisk the milk and eggs together and add salt and pepper to season

4. Next add the grated cheddar, flour and cooked ingredients to the milk and egg mixture.

5. Once mixed add to the blind baked pastry case and bake at 160 degrees Celsius for 35minutes or until golder brown.

Thursday 25 August 2011

Nursery Painting: Day 1

Yesterday I was called by the agency I work for and asked if I would like to be put forward for a job working in HR part time for the next 3 months.  With the interview tomorrow and the job possibly starting on Tuesday I thought I should make the most of today.  I'm an impatient thing anyway so the massive tin of yellow paint was just too much to keep my mitts off.

The unfortunate thing is that Neil is still working on his Thesis and there is A LOT of furniture in the Nursery so I was limited to a small corner near the door but nevertheless I have achieved 2 coats of yellow paint.  It's probably for the best that I wasn't able to go crazy with the paint fumes anyway.  But I do feel the urge to test out which of our greys will go best with it.  I think the lighter one but Neil thinks the dark will be better.

So here's what the end result should look like in the end.

And this is the first corner, the one by the door on the picture. (Again this is not a true reflection of the true shade)


Neil thinks the story of the colour is a bit like this -


Wednesday 24 August 2011

Nursery Update - Colours chosen

I spent yesterday afternoon clearing out a few more shelves on my bookcase which enabled me to use one just for baby books which we've been collecting.  Many of them aren't really suitable for newborns but we've plenty of bedtime story material for the next few years!


There's obviously still a lot more to get rid of in the Nursery and I'm even considering getting a smaller desk and giving mine away as I really don't need one the size I have at the moment.  In an ideal world I'd like a nice wooden one but we shall see if something suitable comes along on freecycle.  Yesterday out of interest I also decided to look up paint colours online as Neil and I have been discussing painting a few walls in the nursery a nice and bright yellow sunshiney colour.  Lo and behold I find an absolute bargain on the exact colour we were looking for at Homebase and in the tough durable paint that is probably most appropriate for a room that is likely to have a small child dribbling all over it!

This is the colour we went for, it's on sale as it's about to be discontinued for £12.93 for 5L which seemed too good to resist so I reserved it immediately.  On collection it is clear it will look nothing like the image above and is much more akin to a very bright yellow sherbet. (It's so difficult to describe colour and the feeling it brings isn't it!) We're pretty sure we're going to team it with some of the grey we have left over from our downstairs rooms to tone it down a bit.  I'm itching to get the paint brush out but the room still has so much clutter and I am not looking forward to covering over the lovely Laura Ashley Cranberry that I have on one wall at the moment.  Nevertheless it will get done and look so different and really mark the fact that it's no longer my room and that the baby will have a lovely sunny room to grow up in.

For inspiration I'm compiling some images to keep me motivated.
Via Baby Centre
Via. Project Nursery
Via Project Nursery
We wont' know for a few more weeks whether it's a boy or a girl and at the moment I'm liking decorating whilst not knowing, that way our decisions aren't influenced by thinking about pink and blue.  And in the end something that isn't so gender stereotyped will probably last longer in terms of suitability for any new residents.

Via Heather Thompson
The image above is purely just for droolovision, the bookshelves are gorgeous (if a little bland all in white) but the cot is a Stokke and I have been admiring these heavenly things for a few weeks.  I have to say I think our Ikea Donation is just as classic and probably more practical as it's not round!

That's all for now folks, I am exhausted!

Tuesday 23 August 2011

Neil's Yummy Pasta Recipe

- Neil recently invented a very good vegetarian pasta recipe to help use up our mammoth bag load of orange peppers from Lewisham Market.  I asked him to write it up so I could pass the love around. So here we go 


P.s Picture from the first time N made the sauce to accompany stuffed chicken breast wrapped in bacon. Also delicious!
__________________________________________________________________________________


Hello!

This is a diamond of a recipe – great on its own with pasta as a quick lunch or supper, but equally makes a wonderful alfresco lunch with a chicken breast wrapped in bacon.

4 Peppers – any colour but green. I love the orange ones for the colour.

Half a packet of passata (or half of any canned tomato)
2 tbsp of light muscavado sugar
1 vegetable stock cube
“splash” of balsamic vinegar
couple of fresh basil leaves

A good “twirly” pasta like a fusilini :

Equipment
Griddle Pan (Or Grill on high heat if you do not have one)
Saucepan
Food Processor (Or Blender).

  1. Prepare your peppers' by cutting out the seeds and remaining gunk. Press these flat down so they will lie as flat as possible on your griddle pan. Brush with olive oil and season with salt and pepper.
  2. Heat your griddle pan to a strong heat. Once its too hot to hold your hand over the surface, place the pepper skin down. Your looking for the skin to charcoal, which should take 8-10 minutes. Then, flip these over and griddle for another 5 minutes (NB the flesh is more sensitive then the skin side)
  3. Take the pepper off the heat. If you have one, place these a sandwich bag –  or alternatively an air lock container for a couple of minutes. This will help “steam” the charcoaled skin off the pepper.
  4. Peel the blackened skin off the pepper – I find it easier to do this under a running tap!
  5. Get the water into the saucepan and boil ready for the pasta.
  6. Chop up the pepper and put into a pan with the tomato, sugar, stock cube and balsamic vinegar. Just after doing this, pour the pasta with some salt and olive oil into the saucepan and bring to the boil.
  7. Keep the sauce on the heat for 10 minutes and let it thicken
  8. After 10 minutes, tear the basil leaves into the sauce and pour the source into the food processor. Blitz until smooth.
  9. Drain your pasta, mix the two together and enjoy!

    N.B - I (Jenni) love this with salad and a good vinaigrette to balance the sweetness of the sauce.

Summer dress love

I can't work out how to get a bigger picture off the Pepperberry website but OMG I want this dress! Sadly I wont be fitting in to it for some time with my pregnant belly.

Sunday 21 August 2011

Blogger Cruelty

Just logged on to my blog to remind myself of the last blog post I did and there I see an advert for Thorntons! What are you trying to do to me blog!? Now I am SOOOOO craving sickly sweet chocolate. mmmmm

I also just found this 'Yummy Bag' from Hotel Chocolate which would certainly be an acceptable new baby gift pour moi ;)

Sunday 14 August 2011

Chocolate Oaties

Last night I had the urge for some chocolate oat biscuits like I used to have at break time when I was at Middle School in Long Stratton.  They always came out warm from the oven and had a soft and sweet chocolate icing topping.

I made something similar with my friend Nicky during my A-levels so I thought I'd see if I could look for a recipe online.  All the recipes use a chocolate topping rather than what I remember being a slightly gooey chocolate icing.

In the end I went for this recipe - (Adapted from here)

Ingredients
Serves24
  • 225g (8 oz) margarine
  • 225g (8 oz) caster sugar
  • 225g (8 oz) self-raising flour.
  • 140g (5 oz) porridge oats
  • 55g (2 oz) cocoa
  • Icing sugar and 2 tsp cocoa powder for covering
Preparation method
Prep:15  minsCook:15  mins | Extra time:30min, chilling
1.
In a large pan melt together margarine and sugar.
2.
When sugar is completely dissolved remove from heat and mix in oats, cocoa and nuts. Mix in self-raising flour.
3.
Turn into a 20x30cm (13x9 in) baking tray and press down well.
4.
Bake at 180 C / Gas 4 for 15 minutes.
5.
Cool then cover with chocolate icing. Chill to set.

Saturday 13 August 2011

August Holiday

I've unexpectedly had a bit more time off than I was anticipating as the agency I'm working for didn't have any work for me after my planned time off after I finished my last job.  The time has gone pretty fast, I've been relaxing quite a lot but also been able to have a lovely time with friends.


I am beginning to wonder what I have been doing with all my time, and I think in truth a lot of television watching .  I am also starting to notice that I am finding normal household tasks quite exhausting.  Even just taking the washing from the machine to the dryer upstairs really makes me feel like I need a good sit down!

I drew out an outline of our house today and listed in each room, the things we will need to do before the baby arrives.  A lot of it is stuff that doesn't relate directly to having the baby but I get the impression we'll have very little time or energy to do any D.I.Y after we have a newborn to look after.  I really hope that we can get all of the things done in time.  This list obviously includes the whole bathroom re-do so there aren't many things on the list that can be ticked off very easily.  The problem is quite a few of them involve extensive time, money and energy.  The time I have, but although Neil is at home he's working night and day on his masters Thesis. I swear you've never seen anyone work so much, I certainly don't have the concentration to be so dedicated to anything.

And, you're hearing me right, my husband is home! He arrived back late on Thursday evening and will be at home till his first day of term in September.  It's all a bit scary as in September he'll be a proper science teacher.  I'm so proud of him, thinking of him taking on all those girls and making them believe that Science is fun, useful and interesting.  If anyone can do it, he can.  I can't wait to hear about all the things they say, I'll bet they'll come out with some corkers!

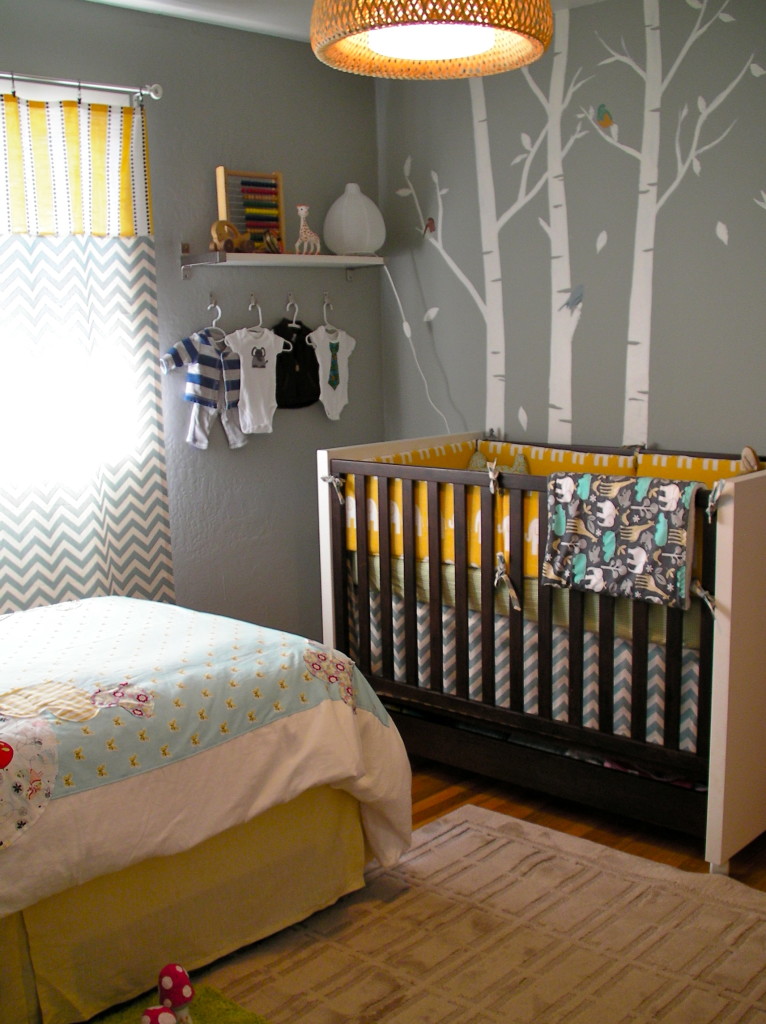
I have been successful in finally tidying the 'Nursery'.  I was given a reason to tidy as my friends came to stay and needed some floor space to put down the bed.  There's still lots of stuff and very little storage but we are getting there.  We have so much clothing and we even managed to sort through it properly.  Being ruthless and getting rid of all the surplus stuff we have and then organising it in to 3 different sections. Stuff only for girls, stuff only for boys and things that are suitable for both.  Neil and I did have some disagreements on what constitutes unisex but we got there in the end and it was so much fun.  Even though all our stuff is second hand it's 'new' to us and it's so much fun looking through it.  Almost like being in a free sweetshop!


I also picked up some Duplo off Freecycle recently and spent a good afternoon making shapes.  I have to admit it was quite relaxing, so I hope the baby likes playing when they're old enough.  In any case I can play with it whilst they play with the multitude of other things we have available.

We even went to visit 'Babies'r'us and Mothercare yesterday.  We found the car seat we've been looking at (Britax First Class Plus) for a good price in Toys'r'us and tried to buy it but they wouldn't let us take the one off the shop floor and didn't have any in stock so we were foiled from buying anything yet again.  There was also nothing of interest to us in Mothercare, we have had so much stuff given to us we're quite stingy in terms of prices we're willing to pay.

However, we have now realised that Ikea do cot mattresses which we're sold on.  We were going to go and get one today but we decided to wait until I have a few more weeks wages in the bank.  They are really reasonable though and as the cot we were kindly donated is from there is makes sense.  (Also our own mattress is from Ikea and we love it.)  P.s how cute are Ikea toys!

Monday 1 August 2011

Old fashioned cleaning.

Our new (but old and limescaled) mixer tap for the bath arrived today. It is very heavy and in need of a good clean. I've Googled limescale removal methods a million times but never actually done it.

Yet, here i find myself sitting in our sunny and breezy garden dabbing vinegar onto cotton wool balls, willing them to clean up my taps. Articles available online give differing times for how long i should leave them. I think I'll give it a good few hours.

And then, after the 3rd and 4th attempt I'll be out with the brass.cleaner!!


Share

Search This Blog